
The Contractor’s Guide to Construction Cost Codes: Setup, Best Practices, and Common Mistakes
By Meredith Dobbs


Construction cost codes are standardized numbers or labels used to sort and track project expenses like labor, materials, and equipment. Understanding cost codes is key to the accounting of a construction business. But when a business doesn’t understand cost codes, it can create an accounting nightmare.
This guide covers what cost codes are, how to set them up, how they connect to QuickBooks Online, and the mistakes that trip up most contractors. Throughout, you will hear from Penny Lane, a JobTread accounting and business coach partner who helps contractors build job costing systems that work.
What Is a Cost Code?
“Cost codes are labels assigned to a specific type of work on a construction project, used to track and categorize costs.” - Penny Lane
Let’s start with the basics.
“Cost codes are labels assigned to a specific type of work on a construction project, used to track and categorize costs,” Lane explains.
That’s it. A cost code is a label. Framing. Plumbing. Site Work. Every dollar that flows through a project gets tagged with one of these labels, so you can see exactly what each type of work costs.
Think of cost codes like the aisles in a grocery store, each one organizing a different type of cost. Without them, every expense lands in one, chaotic pile. With them, every expense has a home, and you can find what you need in seconds, the same way you know exactly which aisle at the store has the bread. Instead of bread, though, a cost code category might be electrical where every electrical cost on the job lands.
The Two Universal Systems: CSI MasterFormat and NAHB

You do not have to invent your labels from scratch. The construction industry has two widely used cost coding systems, and choosing which one fits your business is the first decision you need to make before you set up your codes.
CSI MasterFormat
CSI MasterFormat is published by the Construction Specifications Institute and organizes all construction work into 50 numbered divisions. Division 03 is Concrete. Division 22 is Plumbing. Division 26 is Electrical. Every product, task, and spec on a project gets a fixed address within those divisions.
Who Uses It:
Commercial contractors, government contractors, and teams on large projects. MasterFormat is the shared language of commercial construction. Architects write specs in it, subs bid in it, and pay applications reference it.
NAHB
NAHB cost codes come from the National Association of Home Builders as part of its industry standard chart of accounts. Instead of 50 divisions built around specifications, NAHB codes follow the natural sequence of building a home, from site work and foundation through framing, mechanicals, and finish.
Who Uses It:
Home builders, remodelers, and residential developers. The codes follow the order a house gets built, so they line up with how lenders release loan money one phase at a time.
How to Know Which One Fits Your Business
If you do commercial or government work, use CSI MasterFormat. The plans, specs, and billing documents you receive are probably already organized by CSI divisions, so matching them keeps your estimates and pay apps speaking the same language as everyone else on the job.
If you build or remodel homes, use NAHB. It mirrors how your jobs run and how your bank thinks.
If you are a smaller operation in either lane, start with a simplified version of whichever standard fits your work. “The most popular for general contractors would be the NAHB or CSI MasterFormat, but many prefer to keep it simple into main categories: framing, plumbing, electrical, etc.,” Lane says.
That last point matters. You do not need all 50 CSI divisions or the full NAHB chart of accounts, which runs hundreds of line items deep. Most small to mid-sized contractors do best starting with a trimmed version of one standard, then adding detail only where they need it. Both systems exist to give you consistency, not homework.
NAHB and CSI are the two most common systems, but some builders prefer to build their own. JobTread supports that, too. Contractors can import their custom cost codes and organize their lists however it makes sense for their business.
What a Cost Code Is Not
Most cost code problems start with a mix-up over what belongs on the list. Three things get confused with cost codes over and over: budgets, products, and places.
Start with the budget. Your budget is the plan. It says how much you expect to spend on a specific project. Cost codes are the structure. They are the consistent categories by which your budget, your actual costs, and your reports are all organized. The budget changes with every job. Your cost code list stays the same from project to project, which is exactly what makes comparison possible. Put simply: the budget is the numbers, and cost codes are the buckets that hold those numbers.
For everything else, use this test: a cost code answers “what type of work is this?” A line item answers “what exactly did we buy or do?” If you can put it in a shopping cart, point to it in a room, or find it in your contacts, it’s not a cost code.
These are Cost Codes:
| Cost Code | Why It Works |
|---|---|
| Electrical | A type of work that appears on every job |
| Electrical - Labor Electrical - Materials | Same type of work, split by cost type for QBO |
| Plumbing - Subcontractor | Type of work plus who performs it |
| Framing | A phase you can compare estimate vs. actual on every project |
| Site Work | Broad, clear, repeatable across jobs |
| Finish Carpentry | Distinct enough to be meaningful, broad enough to code receipts fast |
These are not Cost Codes, and here is where they actually belong:
| Mistake | Why It Fails | Where It Belongs |
|---|---|---|
| Doorbell | It’s a product. The cost code is Electrical (or Low Voltage). The doorbell is a line item under it. | Line item on the estimate |
| 2x4s | A material. You’d need a thousand codes like this and could never compare jobs. | Line item under Framing - Materials |
| Kohler faucet | A product and a brand. Brands change; work types don’t. | Line item under Plumbing - Materials |
| Kitchen / Master Bathroom | A location, not a type of work. A kitchen contains ten types of work. | Job area or estimate group, if your software tracks rooms like JobTread |
| Home Depot | A vendor. Coding by where you bought it tells you nothing about what phase it fed. | Vendor field on the bill or receipt |
| ABC Plumbing | Also a vendor. The code is Plumbing - Subcontractor no matter who you hire. | Vendor record |
| Mike’s hours | A person. People move between phases. | Time entry coded to the phase Mike worked on |
| Smith Job Punch List | A one-off. Codes must repeat across jobs or comparison breaks. | Task list or a general Punch Out / Warranty code used on every job |
“Cost codes should never be rooms or very specific items like 2x4s,” Lane says.
If a homeowner could point at it, it’s a line item. If a bookkeeper could group a hundred receipts under it, it’s a cost code.
Why Cost Codes Matter
Without cost codes, you cannot answer the most important question in construction: did this job make money, and where did it make or lose it?
“One of the primary uses of cost codes is for job cost reporting, comparing the estimated cost of a particular phase or type of work to the actual cost,” Lane says. “Cost codes allow us to group the same type of costs together on reports, allowing for meaningful analysis of the estimated costs and actual costs.”
That analysis pays off in two ways. First, it shows you which phases of a project are on or off track while the job is still running when you can do something about it. Second, it gives you reliable data for future bids. If your framing estimates have run 12 percent over on the last five jobs, your next estimate should reflect that.
Cost codes also show up on the billing side. “Cost codes are also often used to invoice customers, including on AIA style billing, and many banks require cost code invoice breakdown,” Lane notes. If you work with construction lenders or commercial clients, a clean cost code structure is not optional. It’s a requirement.
Building Your Cost Code List
If you’re starting from zero, don’t overthink it. Lane’s process with new clients starts with what they already have.
“When I’m helping contractors who have not previously utilized cost codes, the first thing we do is look at their detailed job estimates. Oftentimes they are actually using cost codes in their estimating, they just may not be referring to them as such.”- Penny Lane
In other words, if your estimates already break work into line items like demo, framing, and drywall, you are closer than you think. The main role of cost codes is job costing, so Lane starts by asking one question: what do you want to see on an estimated versus actual report? Do you want labor and materials separated out? Your answer determines how detailed your codes need to be.
For contractors starting completely fresh, research the CSI and NAHB systems covered above and pick whichever fits your work.
Cost Codes vs. Cost Types
Cost Types ≠ Cost Codes: A cost type sits one level above a cost code in JobTread. It is a tag that identifies whether a line item is material, labor, subcontractor, or another category. Cost types do two things: they let JobTread apply margin automatically, and they determine which line items your team can clock time into on a job.
Where Contractors Run into Trouble: This happens when contractors use cost types to drive their QuickBooks Online mapping. JobTread hides the cost type view by default in the QuickBooks integration settings on purpose. Mapping cost types and cost codes together into QuickBooks gives you two places for something to go wrong instead of one, and that extra complexity opens the door to more human error.
The Fix: If you want labor and materials to show up as separate categories in QuickBooks, do not rely on the cost type field. Instead, build the split into your cost code names.
For example, instead of creating the cost code “Electrical” with the cost type “Labor,” which are two separate fields that need to map to QuickBooks, create one cost code called “Electrical - Labor.” The same logic applies to materials: “Electrical - Materials” works better as a single code than “Electrical” paired with the cost type “Materials.” Keeping it simple with one code and one field (instead of two) reduces the chance for errors down the line.
Why This Works: Each named cost code maps to its own Product or Service in QuickBooks, and each Product or Service connects to its own expense account. When a bill gets coded to Electrical - Materials in JobTread, it flows to the correct expense account in QuickBooks automatically. Your P&L (Profit and Loss Report) reflects the split without any manual re-entry.
The Takeaway: Your cost code list is doing double duty. It shapes how you see job costs inside JobTread, and it determines how clean your QuickBooks breakdown is. If you want labor, materials, and subcontractor costs to appear separately in QuickBooks, build that structure into your cost code names from the start. Just weigh that against adding so many specific codes that your team struggles to code transactions correctly.
How Cost Codes Map to QuickBooks Online
Here is where cost codes stop being a project management tool and start being an accounting tool.
The JobTread and QuickBooks Online integration connects invoices, bills, payments, and vendors between the two platforms. Your JobTread cost codes map to Products and Services in QuickBooks Online, and each Product and Service connects to an income account and an expense account in your chart of accounts.
That mapping is why cost codes connect directly to your profit and loss statement. When a bill gets coded to “Framing - Materials” in JobTread, it flows to the right expense account in QuickBooks automatically. Your P&L reflects your actual job costs by category without anyone re-entering data.
How to Set Up Cost Codes in JobTread
In JobTread, cost codes are built into the entire workflow. The same codes you use to build an estimate follow the job through budgeting, purchase orders, bills, and job cost reports, so your estimated versus actual comparison happens automatically instead of living in a spreadsheet.
A Few Setup Principles
- Start with your list. Build your cost code list before your first estimate, whether that’s a simplified NAHB structure, a trimmed CSI format, or straightforward trade categories.
- Keep it consistent. The value of cost codes comes from using the same list on every job. Resist the urge to create one-off codes for individual projects.
For a deeper walkthrough, JobTread’s webinar with Penny Lane on mastering the JobTread and QuickBooks Online integration covers cost items, cost codes, and Products and Services mapping in detail.
Start Simple, Then Refine
Cost codes are not an accounting chore. They are how you find out which parts of your business make money and which parts drain it. Start with a short, clear list. Code every transaction consistently. Compare estimated to actual on every job. Within a few projects, your bids will get sharper, and your surprises will get smaller.
JobTread was built to make this loop automatic from the first estimate to the final job cost report to your books in QuickBooks Online. If you want to see how cost codes work across the full platform, schedule a demo.
Keep Learning


Frequently Asked Questions
See exactly where every dollar goes.
Let one of our experts show you how JobTread ties cost codes to estimates, budgets, job costing, and QuickBooks Online.
Book a Demo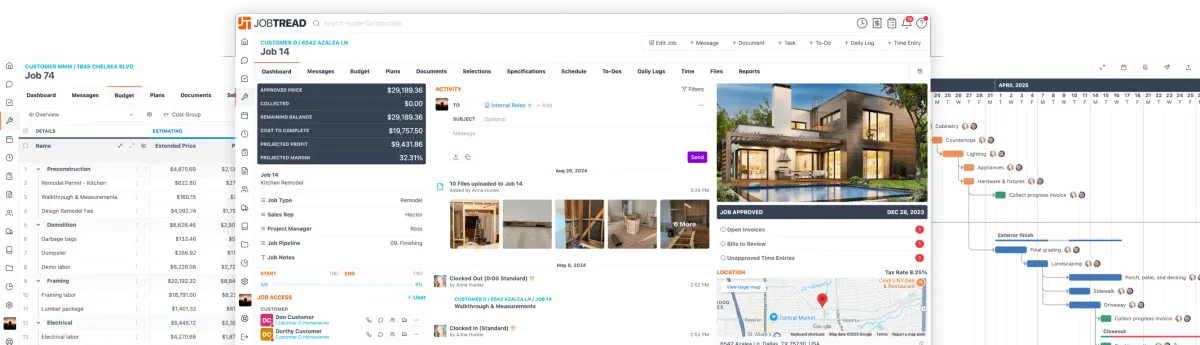

Meredith Dobbs is a Digital Marketing Specialist at JobTread with a background in education, research, and strategic communication. She specializes in creating clear, trustworthy messaging that is rooted in research, crafted for connection, and driven by a deep care for customers and their businesses.